
Noindex, Nofollow Metatags: How to Prevent Google from Indexing Your Webflow Site Pages

Sami Boukhari
17.11.2023
6
min read

In any website, it is crucial to index your pages on search engines like Google for potential visitors to find them in search results. If you've followed the steps in this article to optimize your Webflow site for SEO, you're likely in compliance with Google Search Console, and your site is properly indexed. However, there are times when you might want to prevent Google from indexing certain pages on your site because they are unnecessary and could harm your SEO performance.
In this article, we'll explore why you might want to deindex certain pages and how to use HTML tags to do it correctly on your Webflow site.
Firstly, what does deindexing a page mean? It means removing that page from SERPs (search engine results pages). Once deindexed, your page won't appear in Google search results. There are several reasons why you might want to deindex certain pages:
So, how do you deindex these pages? That's what we'll explain in the next part of this article.
There are two methods to deindex pages on your site: using the robots.txt file and the no index no follow metatags.
The robots.txt file provides information about your site to web crawlers. It indicates which pages robots should crawl and which they shouldn't. The robots.txt file doesn't technically deindex pages; instead, it prevents Google's crawler from accessing the page.
Webflow automatically generates the robots.txt file once your site is created. You can find it in your site's general settings, under the SEO tab, in the Indexing section.
Here, you can add the instructions you want:
Once you've made the modification to your robots.txt file, remember to save and publish your site.
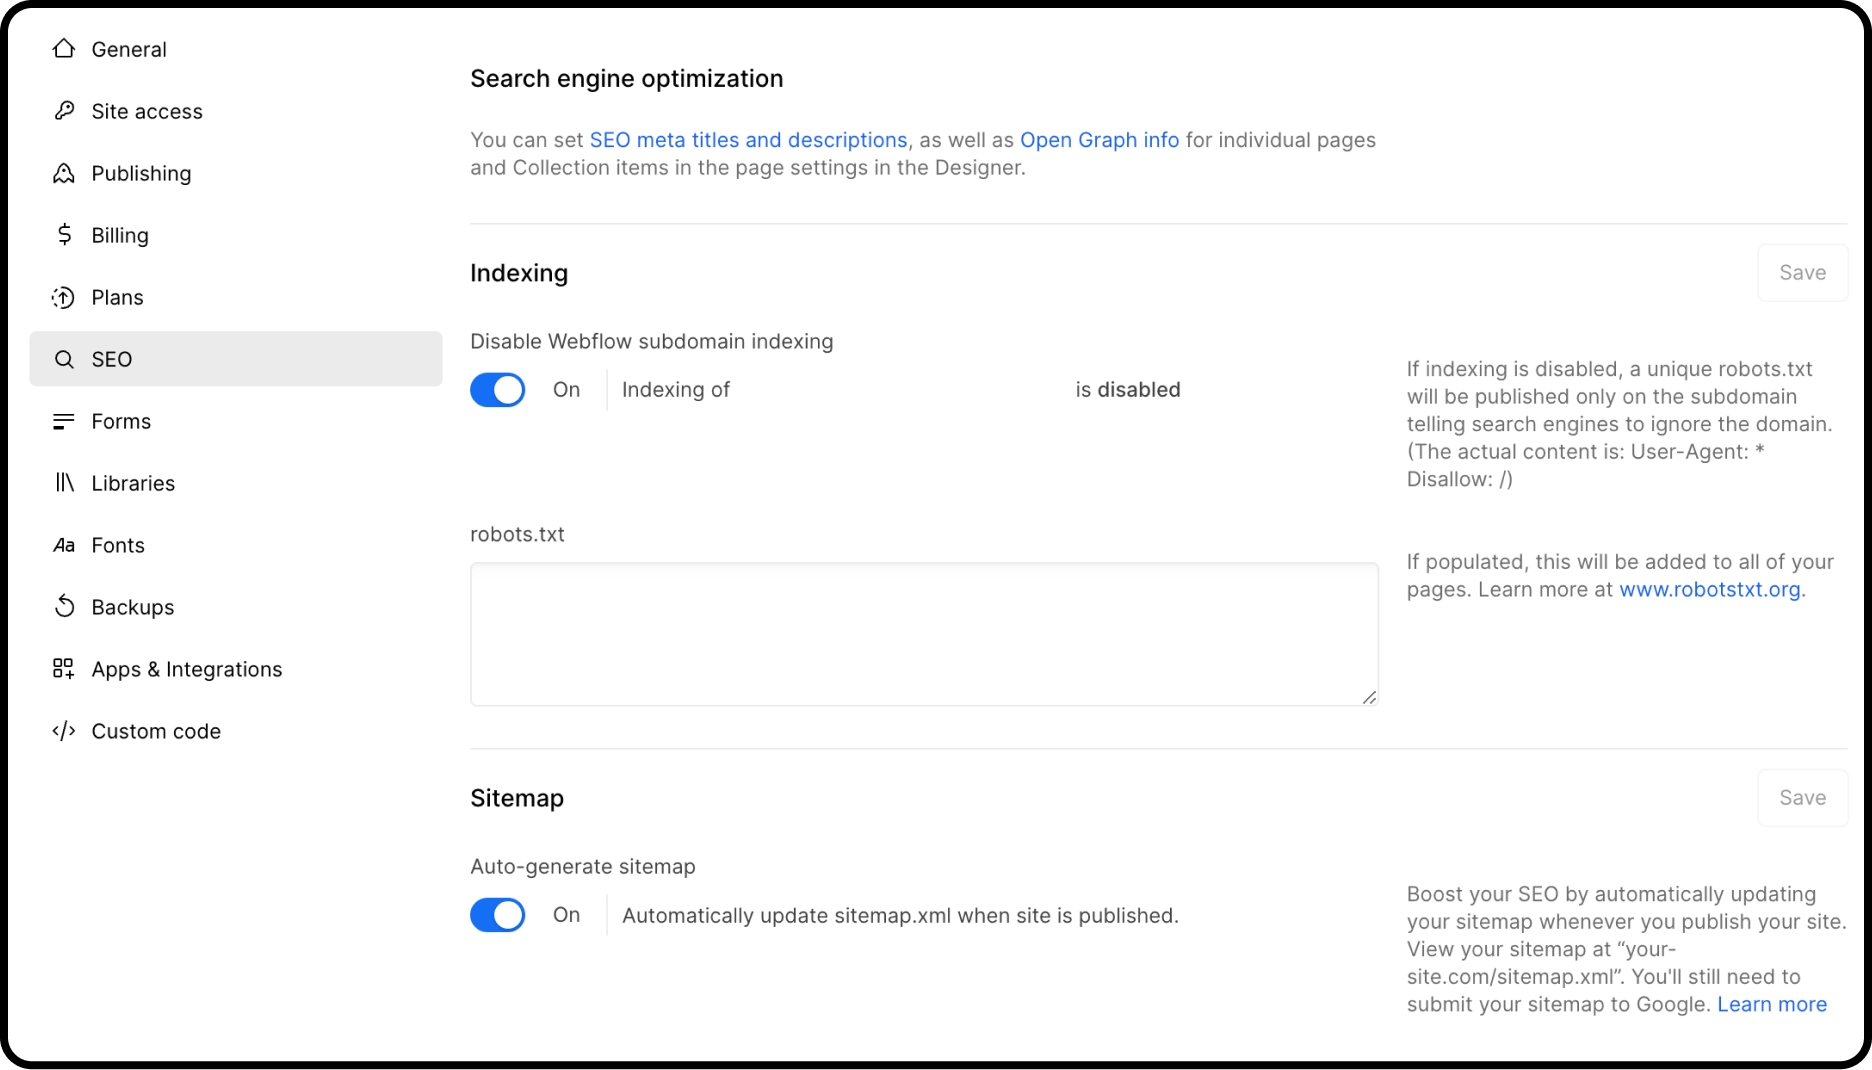
For example, if you want to hide the /pricing page from Google, here's what you'd write in the file:
User-agent: *
Disallow: /pricing.
Note: This method is useful but doesn't always work. For previously published and indexed pages, using the robots.txt file to deindex them may not always work. Google, having already crawled these pages and knowing their content, may continue to index them. It's not recommended to rely solely on the robots.txt file; instead, use the nofollow and noindex tags, as we'll explain in the next paragraph.
The 'noindex' tag instructs search engines not to include the page in search results. This means crawlers can still crawl the page, but it won't appear in search results.
The common method to apply the 'noindex' tag to a web page is to use the following tag in the head code of your page:
<meta name="robots" content="noindex">
The 'nofollow' tag instructs search engines not to crawl the links on the page where you apply the tag. These links will be ignored.
The common method to apply the 'nofollow' tag to a web page is to use the following tag in the head code of your page:
<meta name="robots" content="nofollow">
Both tags, noindex and nofollow, can be used separately or together.
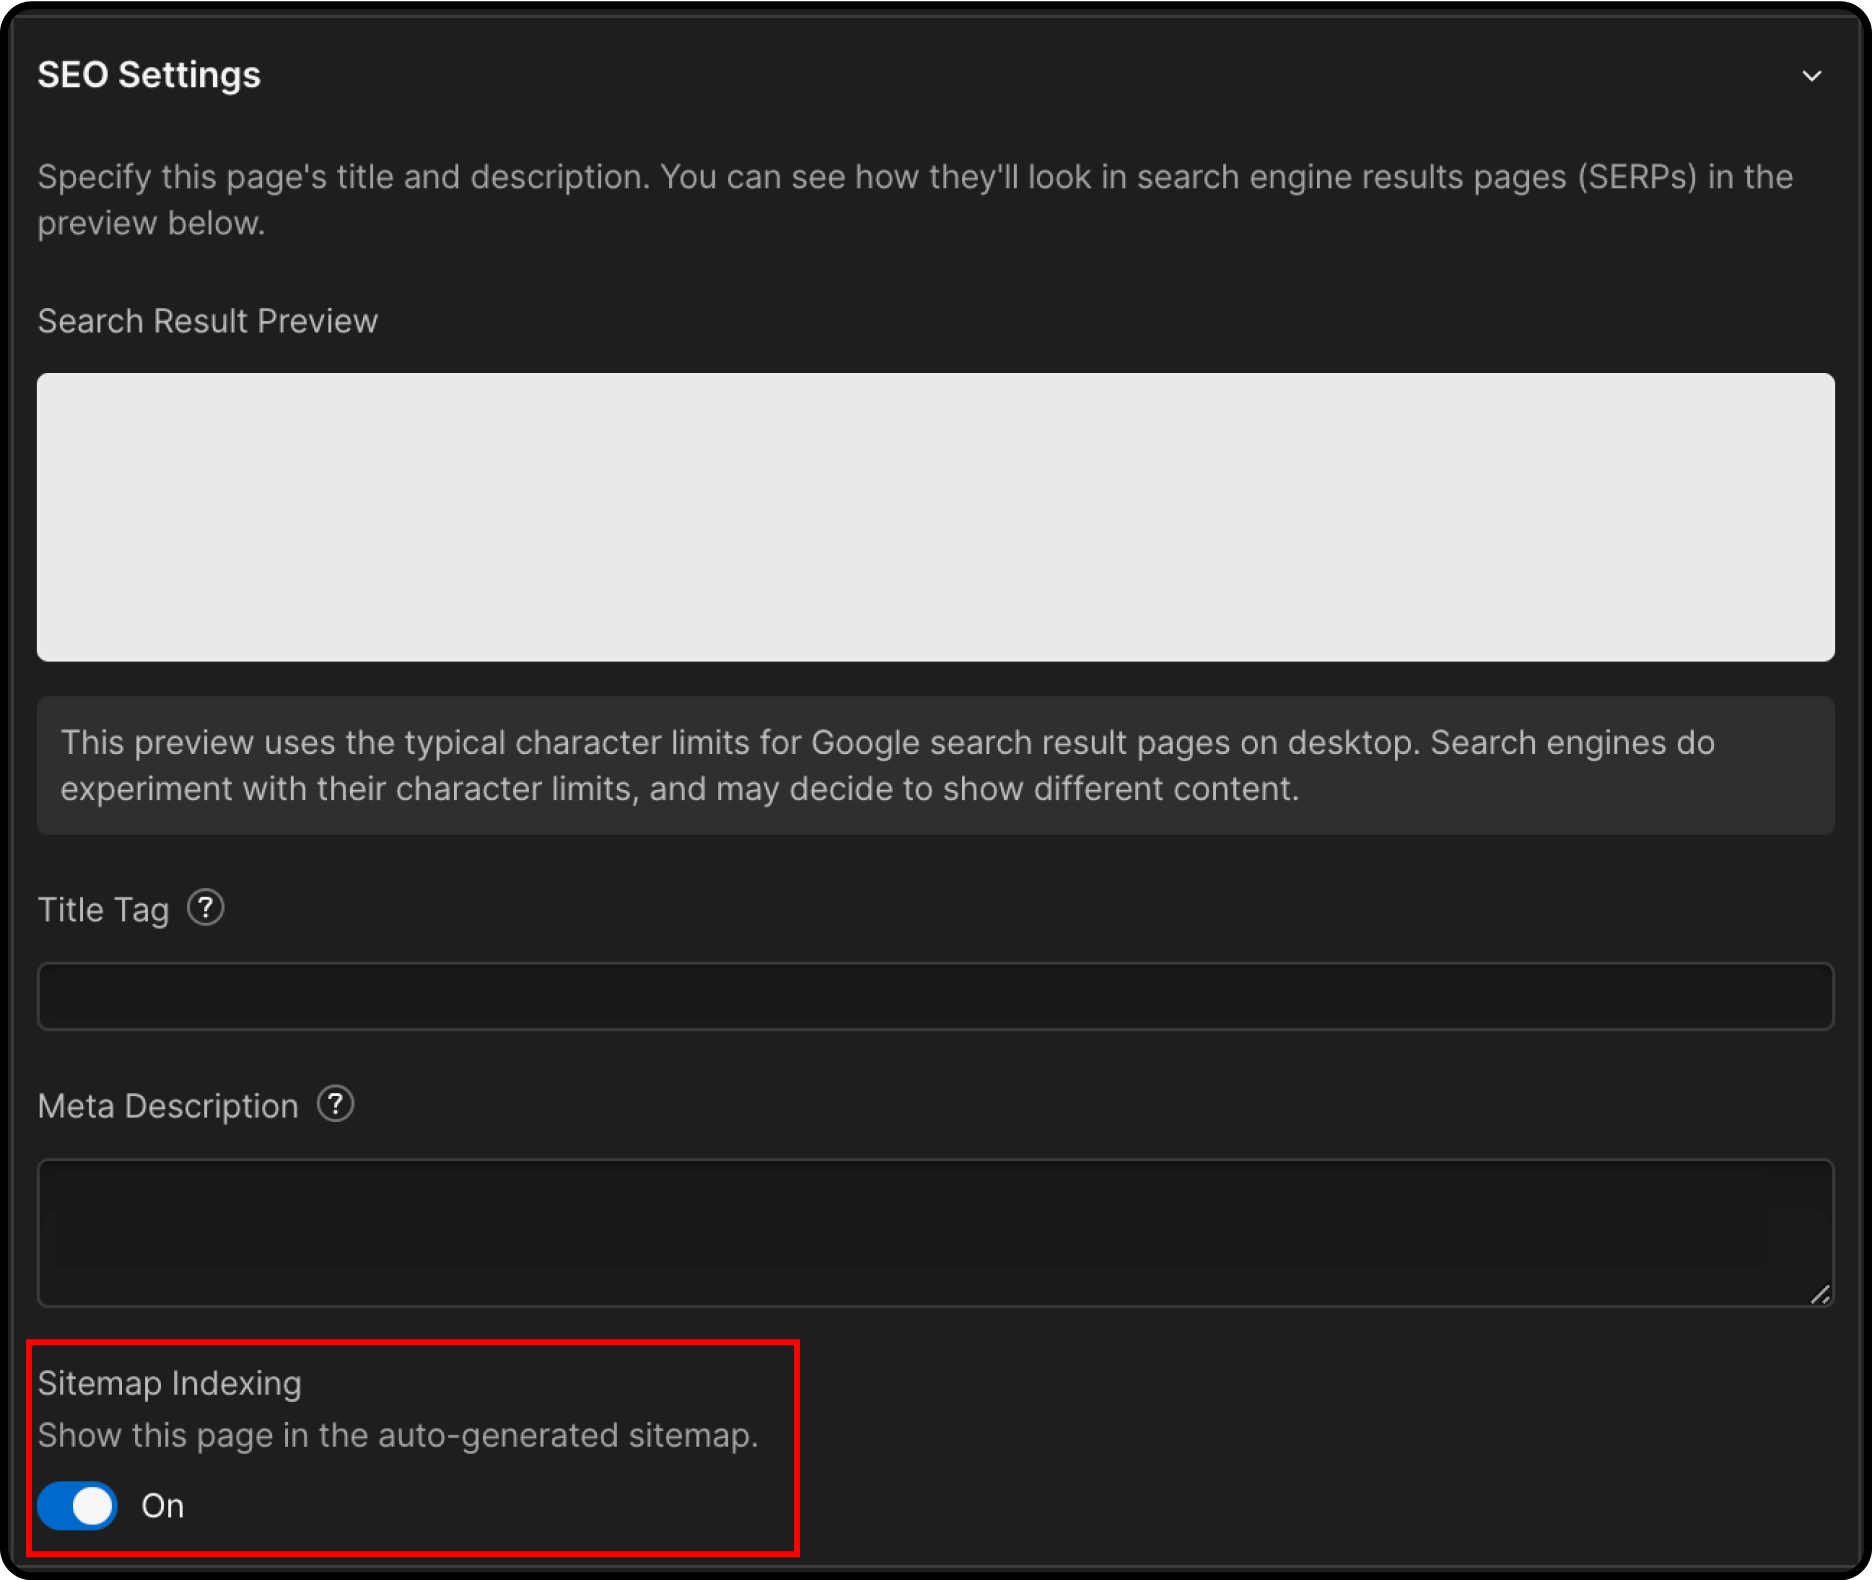
To deindex static pages on your site, Webflow has made it very easy if you have enabled the automatic sitemap generation option. If this option is enabled (go to your site's SEO settings to activate it), then you only need to go to the settings of the page you want to deindex and turn off the 'Sitemap indexing' toggle. By turning it off, the indexing of your page will be disabled. In fact, by turning this toggle off, Webflow automatically adds the following snippet to the head code of your page: <meta name="robots" content="noindex">.
Quick recap:
Note that the Google deindexing process may take several days to several weeks.
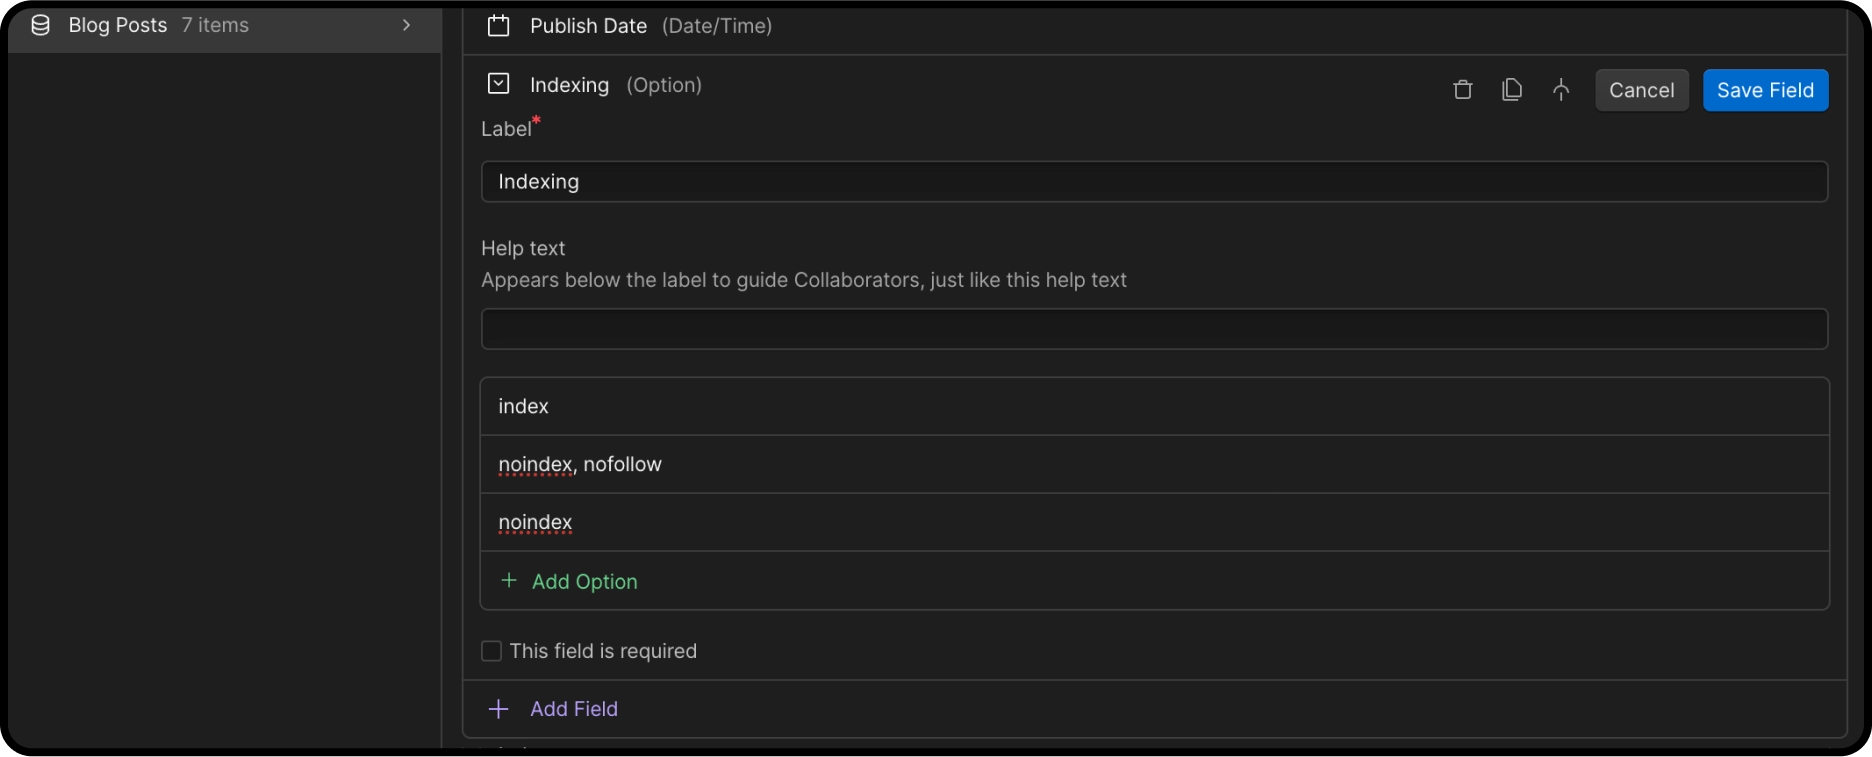
For dynamic pages, i.e., pages created within a CMS collection (e.g., blog article pages), the process is a bit different. If you want to deindex only certain pages, Webflow doesn't offer a deindexing option in the dynamic page settings. It only provides the option to publish or not the entire collection of pages. If you have an item in your CMS collection that you want to deindex, the process depends on your needs. If you don't require either the page or the information stored in the CMS fields of that item, you can simply unpublish it by saving it as a draft. However, what if you need the information from that item but not its page? In this case, the ideal solution would be to deindex the page while retaining the data associated with that item.
Using the <meta name=”robots” content=”noindex”> tag in the head code of your collection's page template is not a solution because the code will be applied to all pages in your collection. But you only want to target some of these pages right? The solution is to deindex these pages dynamically. The first step is to create a field in your CMS collection. You can call this field “Indexing,” select the “option” for the field type, and enter the following values as options:
Now, in the CMS settings of the pages you want to deindex, select the field that suits your situation, either ‘noindex’ or ‘noindex, nofollow’. Then, save the changes.
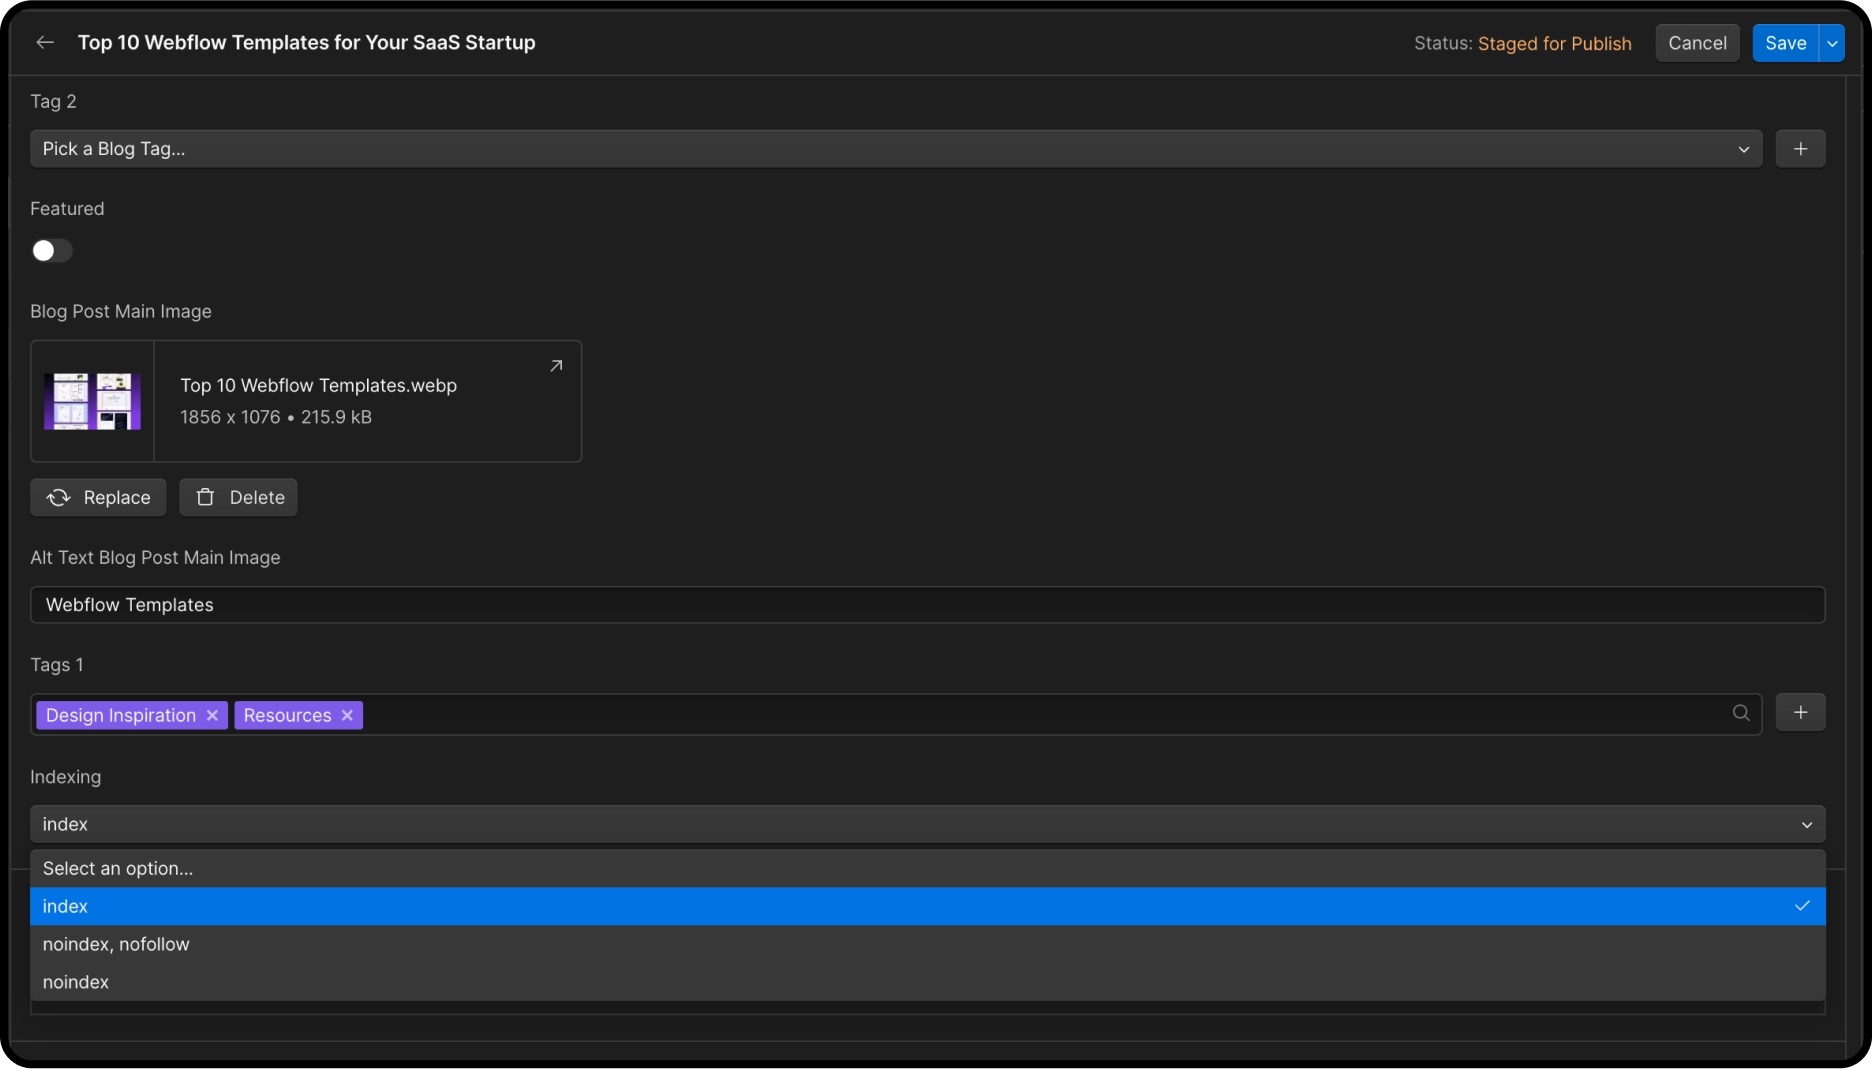
As for the other pages that should remain indexed, select the index option for each of them. Once this step is done, go to the settings of the page template. Go to the Head Code section and copy/paste the snippet:
<meta name="robots" content=" ">
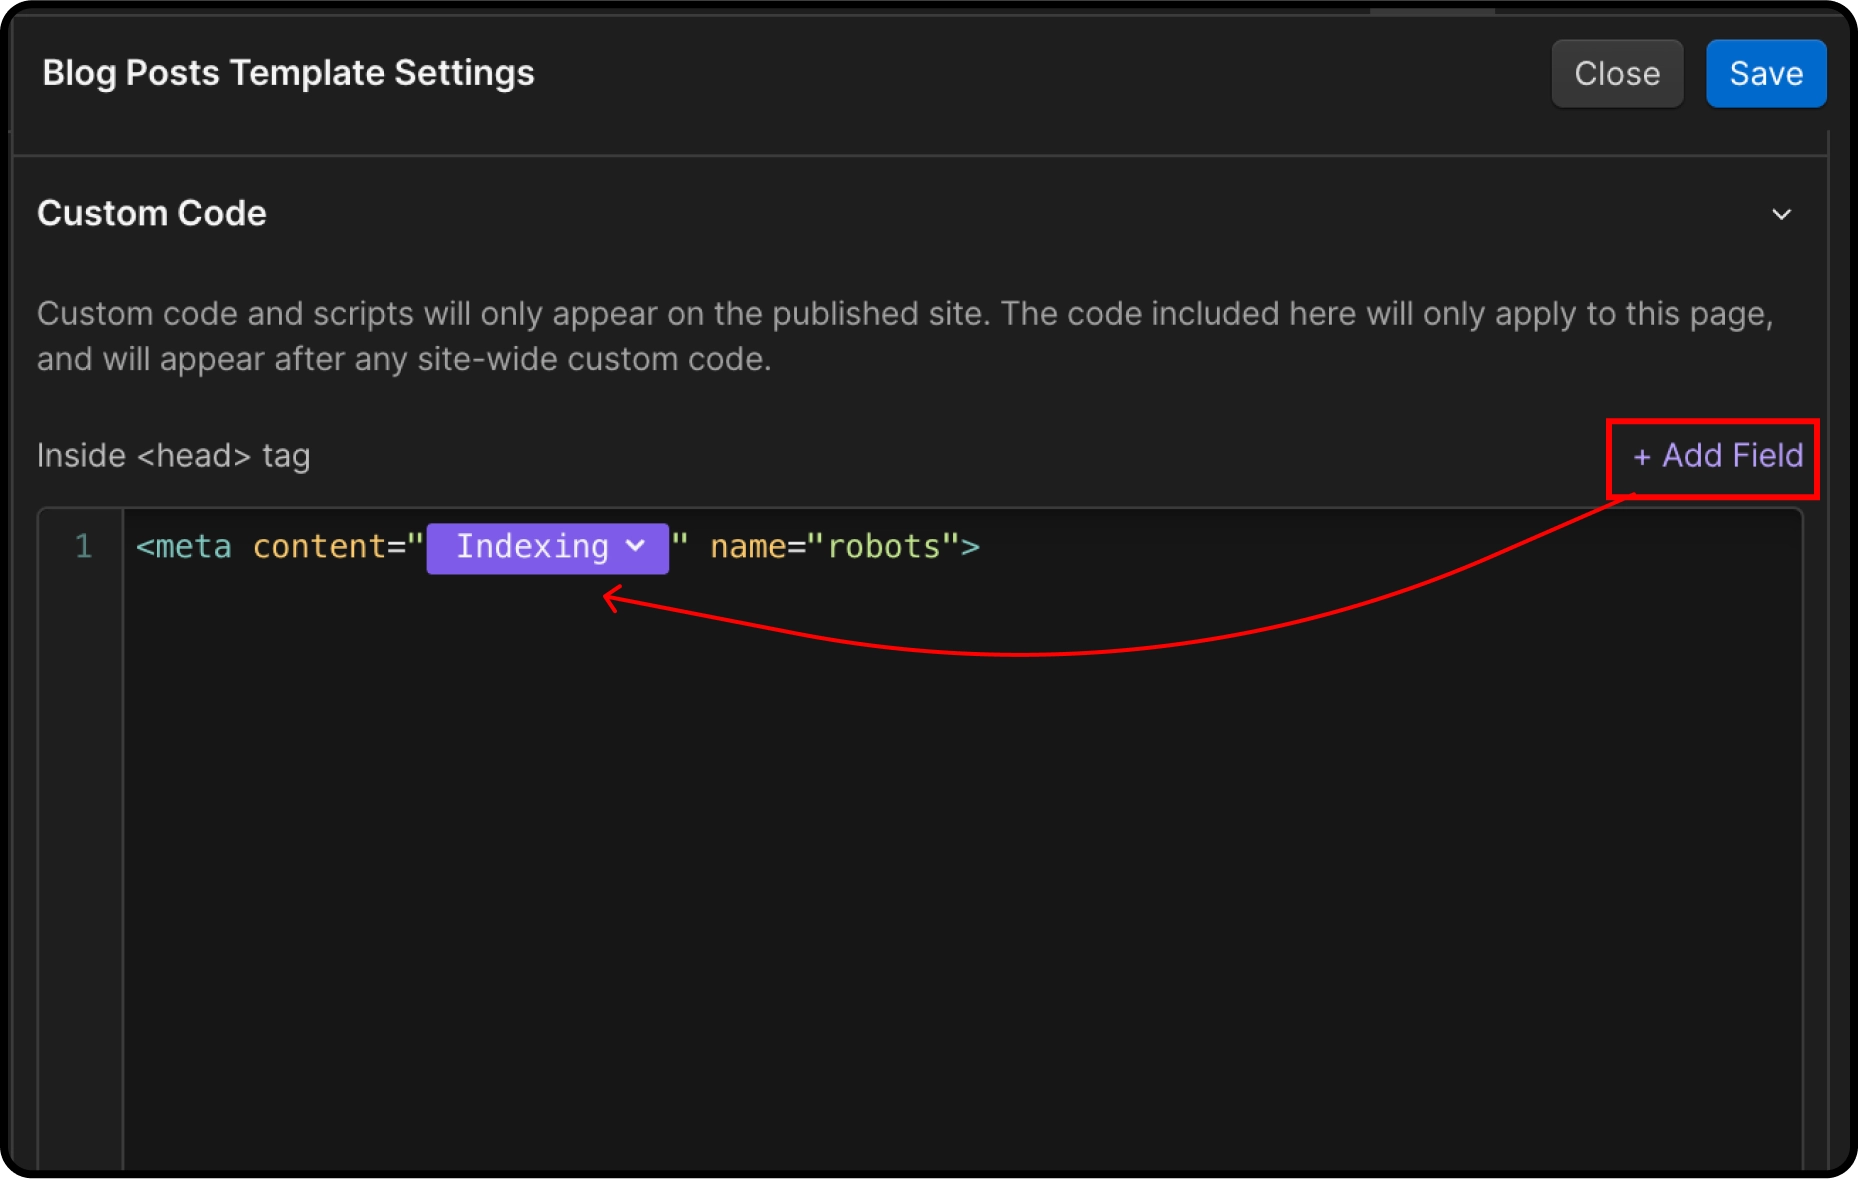
Inside the " " of content=" " add a dynamic field by clicking on the “Add Field” option and selecting the indexing field. This way, if you have selected the noindex option for one of the pages in your CMS collection, then the noindex value will be added, allowing you to deindex the page. Similarly, for the noindex, nofollow value. For pages with the index option selected, there will be no change, as the pages are indexed by default. Don't forget to save the changes and publish your site to make it effective.
Deindexing pages can be an important SEO strategy. Use these methods carefully based on your specific needs. For optimal results, make sure to save and publish your site after making changes.


Ready to step up to the next level? Book a call now and let's discuss your next project together.