
The Ultimate Guide to Optimizing Your Webflow Site for SEO

Sami Boukhari
11.11.2023
10
min read

Search Engine Optimization (SEO) is a critical element for online success. It encompasses a set of practices aimed at improving a website's visibility on search engines like Google. If you want to bring users to your site organically, optimizing your site for SEO should be one of your priorities. In this article, we will explore why SEO is essential and how to leverage the advantages of the Webflow platform to optimize your site.
A good ranking in search results is essential for attracting organic traffic. Users tend to click on the first results, making SEO vital for the growth of your site. With a well-thought-out SEO strategy, your Webflow site can benefit from increased visibility and attract a targeted audience.
Webflow is a CMS that is becoming increasingly popular for its user-friendly interface and development possibilities. Many wonder if Webflow is SEO-friendly, and the answer is YES. Webflow offers several advantages in terms of SEO.
Unlike its competitors like WordPress, Webflow prioritizes clean code, making sites developed on Webflow easily scannable by search engine crawlers and their content easy to understand. In addition, Webflow provides users with all the necessary settings to optimize their site for SEO in the best possible way:
Let's now delve into 11 tips that will help you optimize your Webflow site for better SEO performance.
Meta tags, namely meta title and meta description, play a crucial role as they are the first things your users see about your site. They appear in search results and on social media. Therefore, it's in your best interest to configure them correctly if you want to generate more clicks to your website.
While search engines no longer consider them for ranking, they act as click generators, positively impacting SEO. A website with meta tags that have a good engagement rate (high click-through rate) is perceived positively by search engines like Google and is more likely to rank.
To set up the meta titles and meta descriptions for your Webflow site pages, follow these steps:
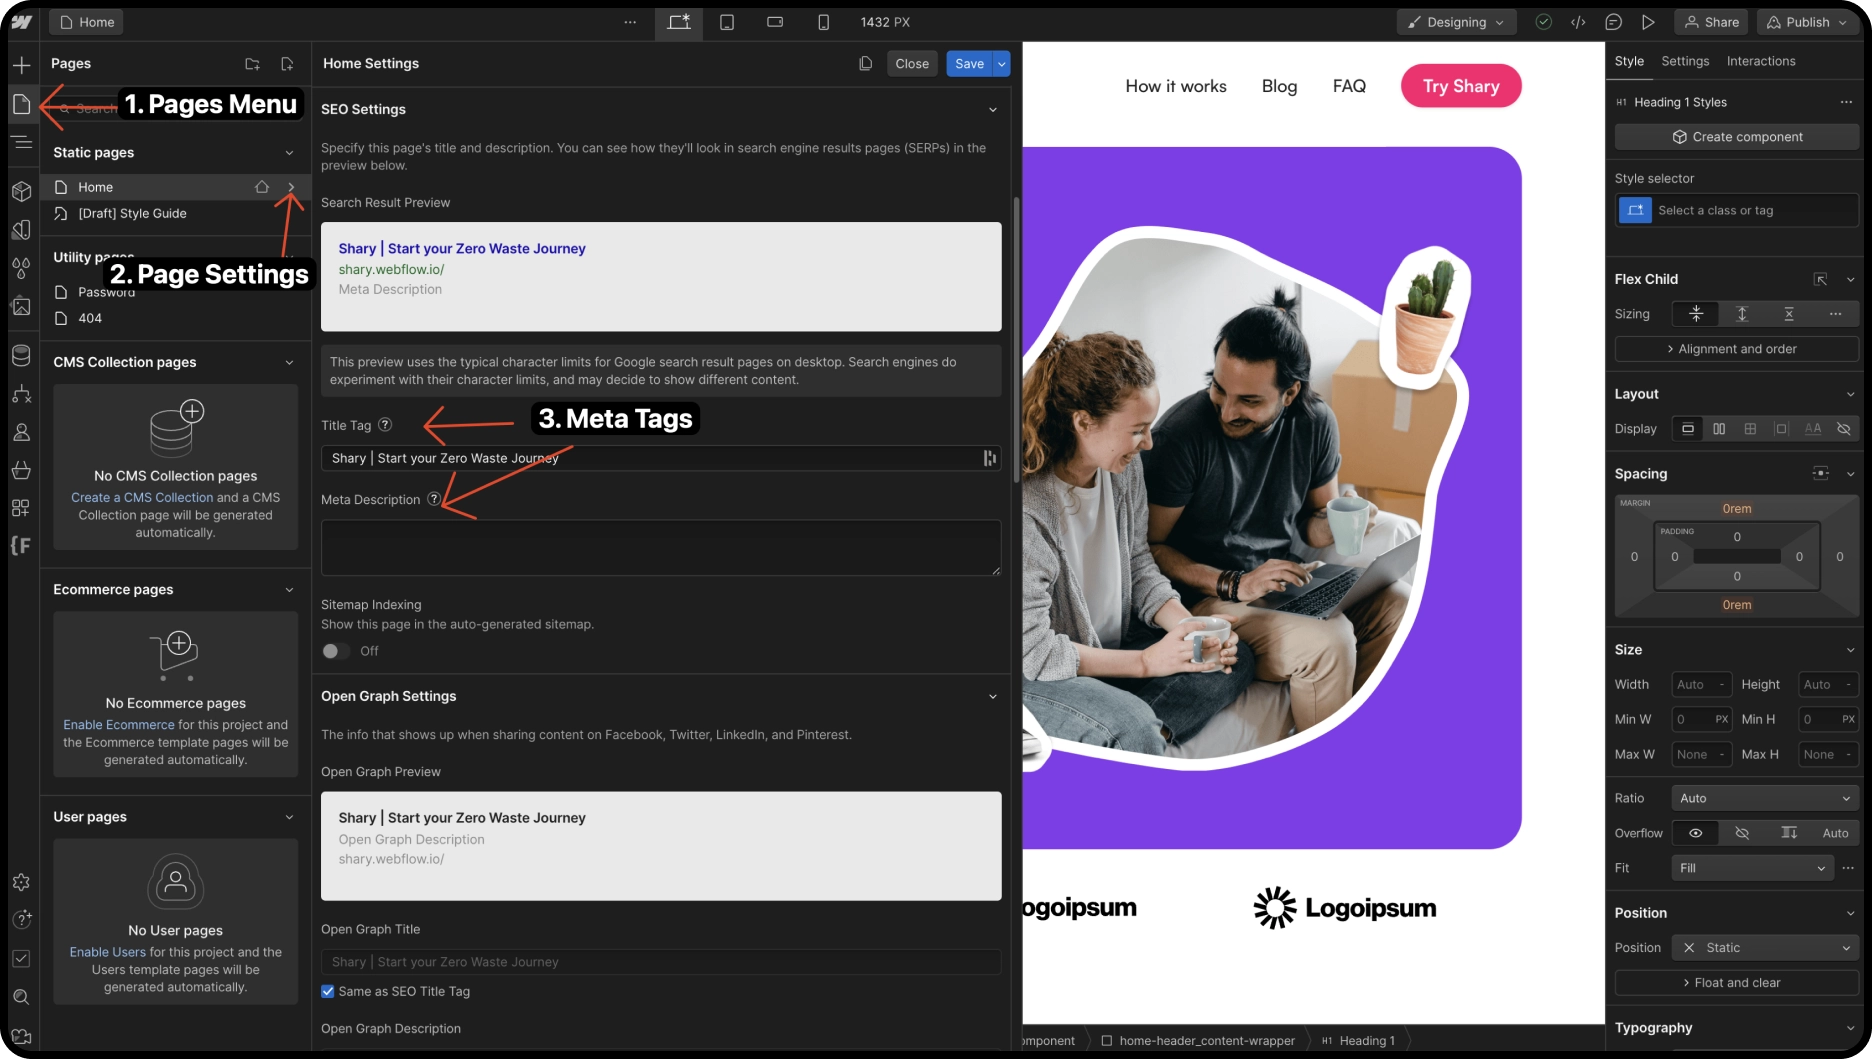
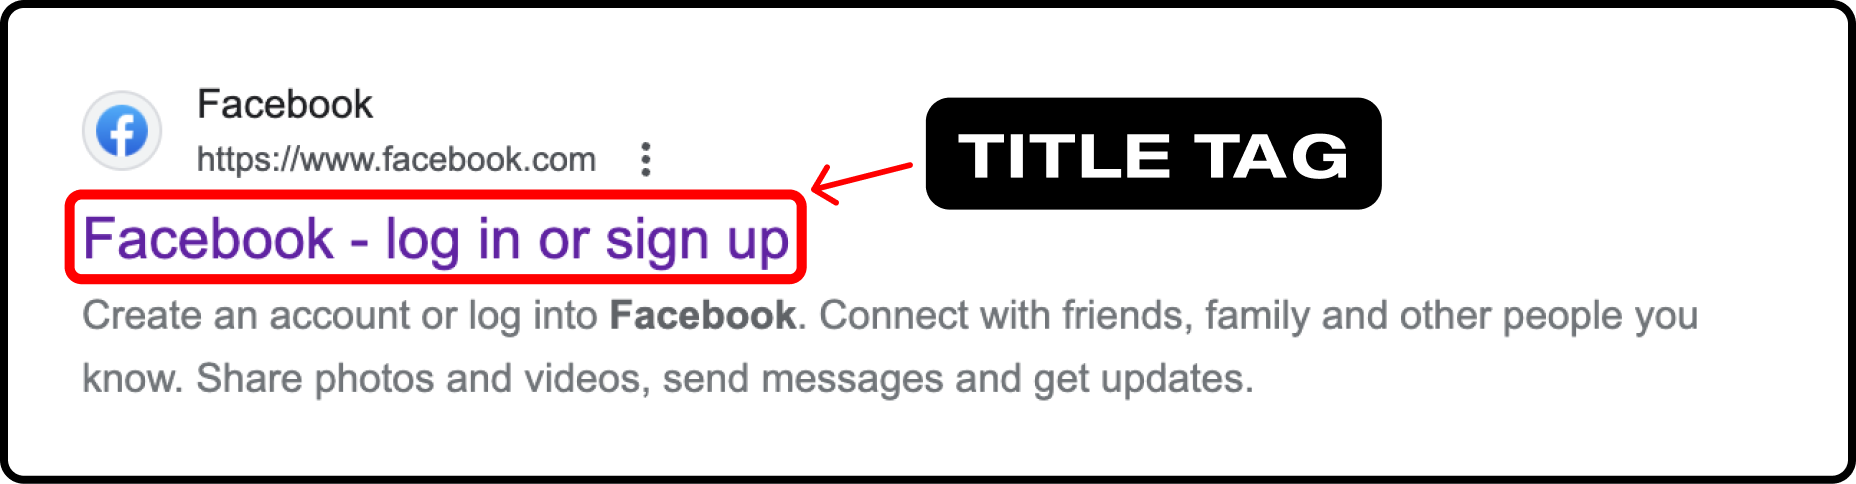
The meta title is the first thing users see. This tag informs your users and search engines about the subject of a web page. Craft a title that quickly convinces visitors while remaining concise. The ideal length for a meta title is between 55 and 65 characters. Keep in mind that Google will truncate your title if it's too long.
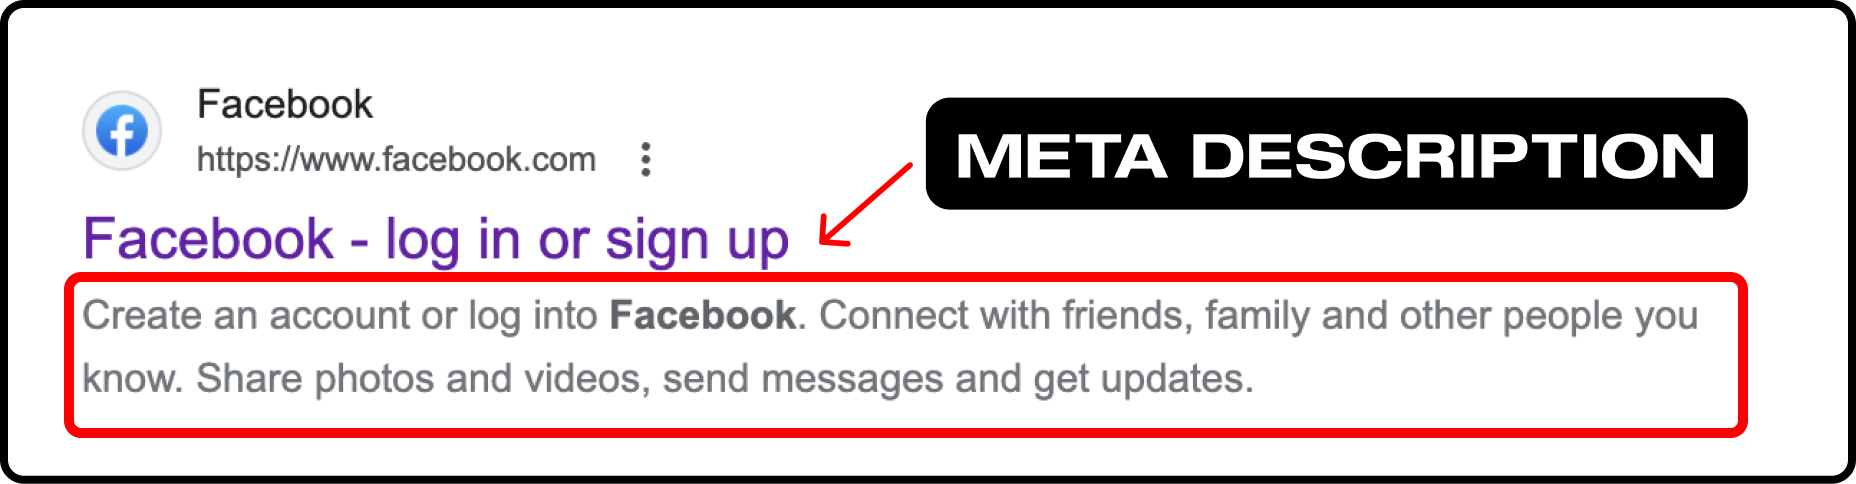
The meta description refers to the brief lines of description aimed at showing the relevance of your page to your users. For visitors not convinced by the meta title, the meta description acts as a backup. An effective meta description should not exceed 160 characters. Like the meta title, a too-long meta description will be truncated by Google. It is advisable to use a unique meta description for each page, relevant to the content of that page, with the goal of convincing your users.
In summary:
Open Graph (OG) is a technology developed by Facebook and used by all social networks (LinkedIn, X, etc…) to highlight data from your site when sharing the URL on these platforms. The information displayed in these sharing elements can be modified in the Open Graph settings of your Webflow pages.
Similar to configuring meta tags, open the settings of your page and go to the Open Graph section. Here, you'll find several settings:
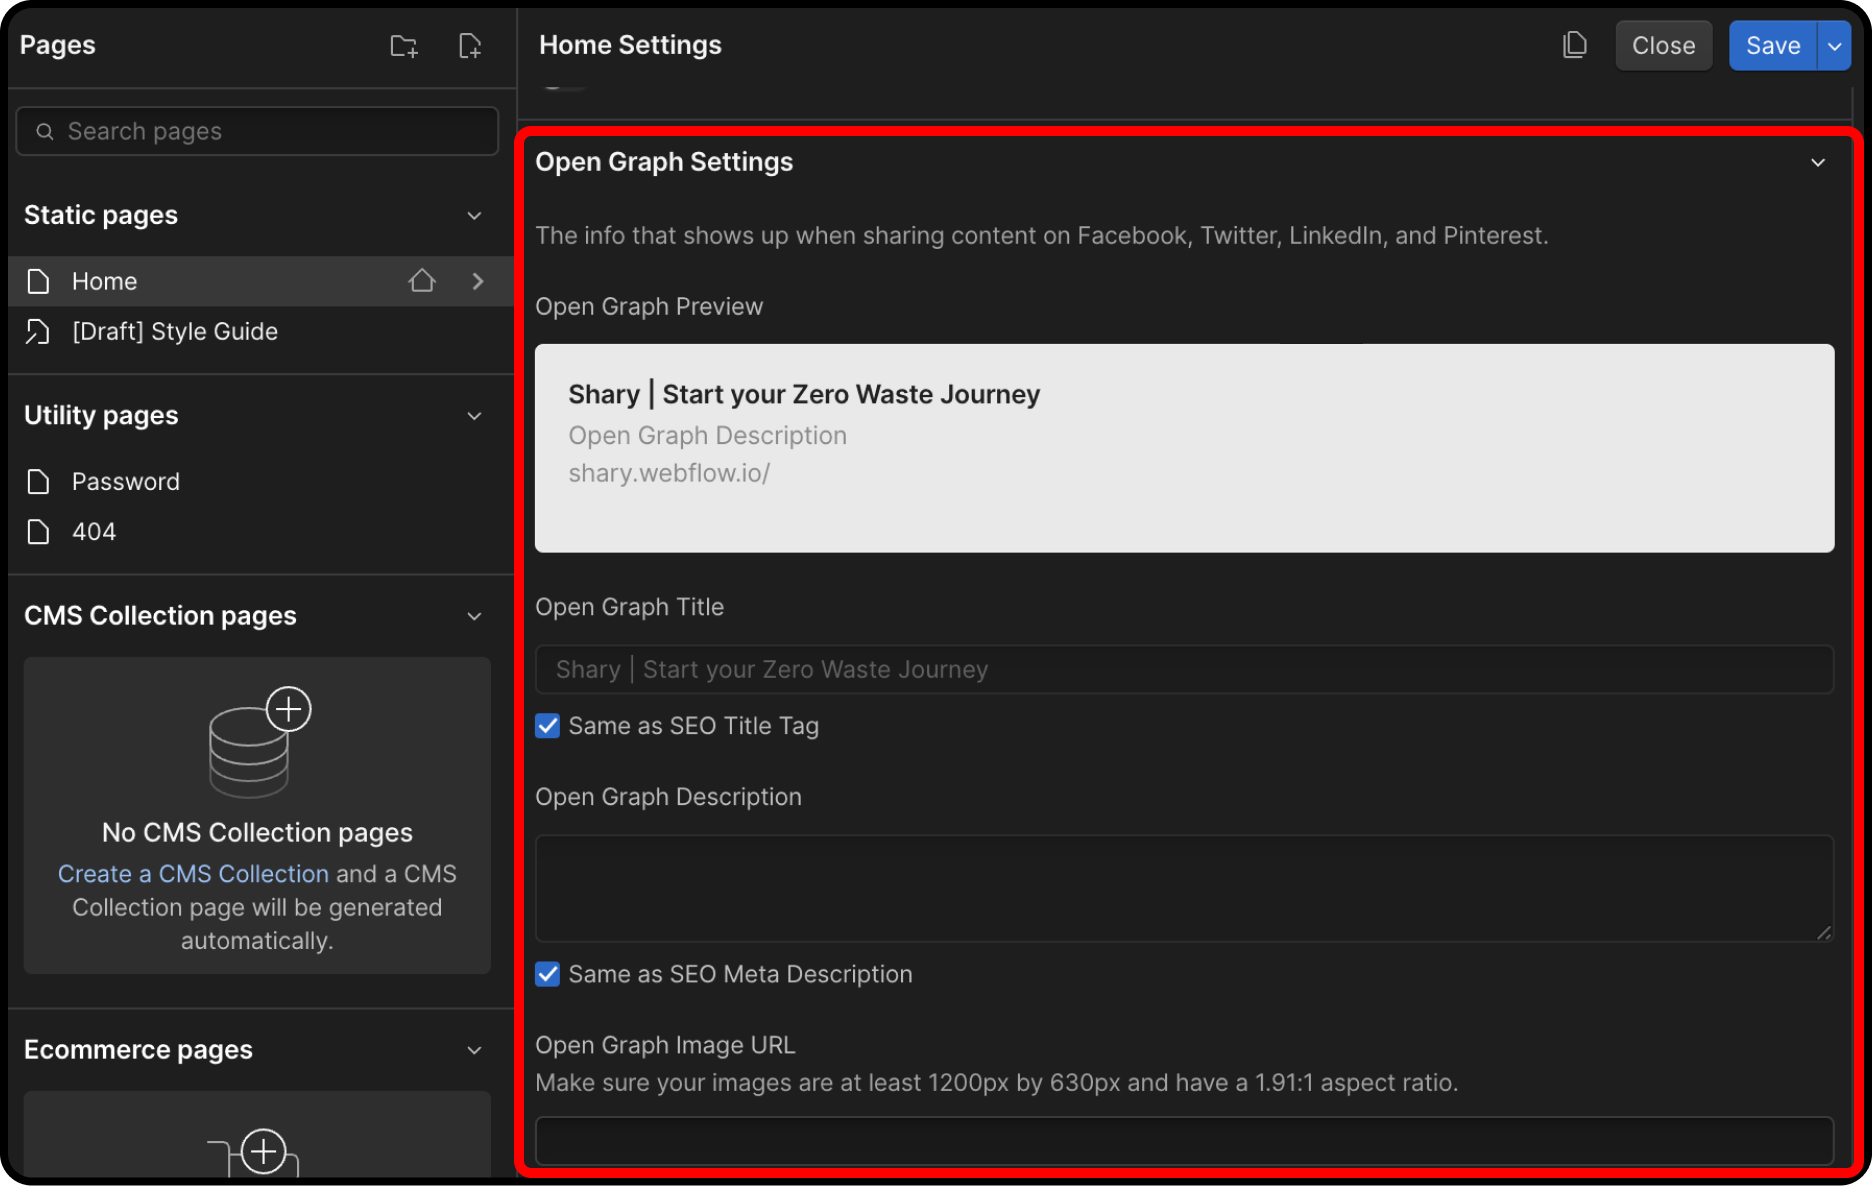
To set the open graph image, follow these steps:
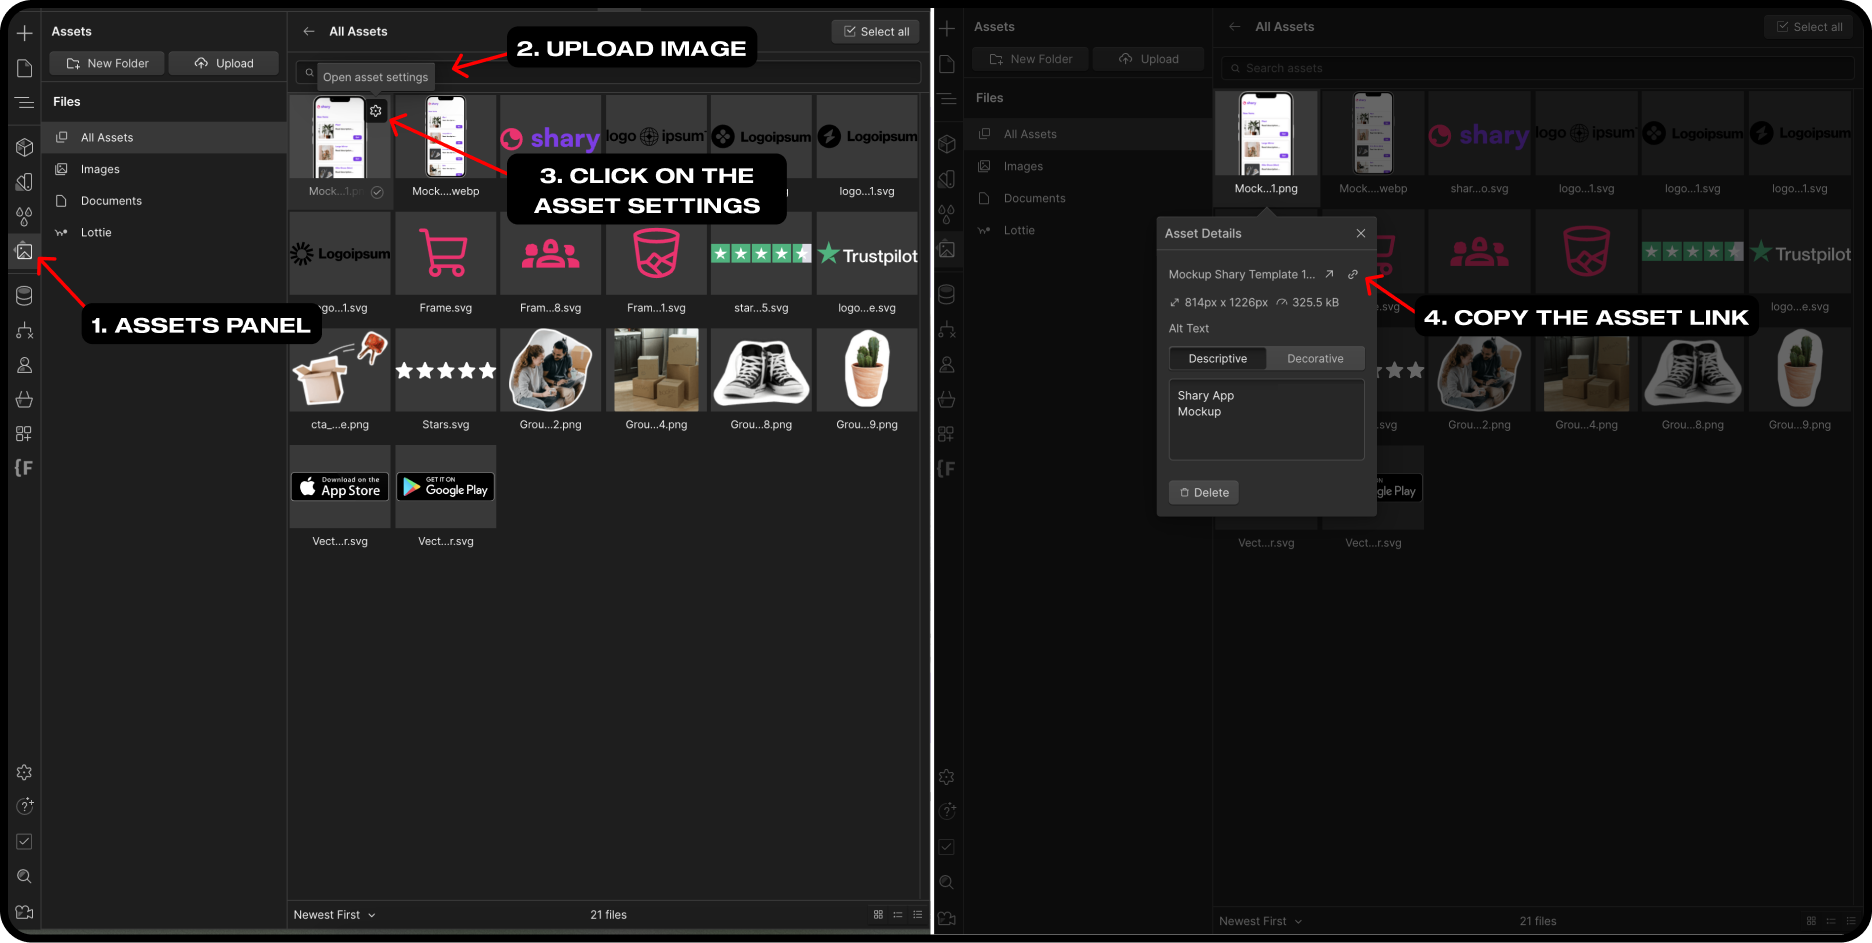
Sites like https://www.opengraph.xyz/ allow you to visualize how your meta data appears in search results or on social media.

The structure of your page URLs is important because your users and robots rely on them to identify your page's content. You should then favor short URLs and use rich keywords that you want to rank for.
In your page settings, within the "General" section, you can rename the URL as you wish.
Alt Texts are like meta descriptions for images. When using images on your website, it's imperative to fill in the Alt Text field for each one. These tags explain to the robots crawling your site the content of images they cannot identify.
These tags are also crucial for your site's accessibility. In case the image cannot be loaded on your site, the description (Alt Text) of your image will be displayed.
These tags contribute to optimizing your images on your site, and good image optimization can help you rank higher in search results.
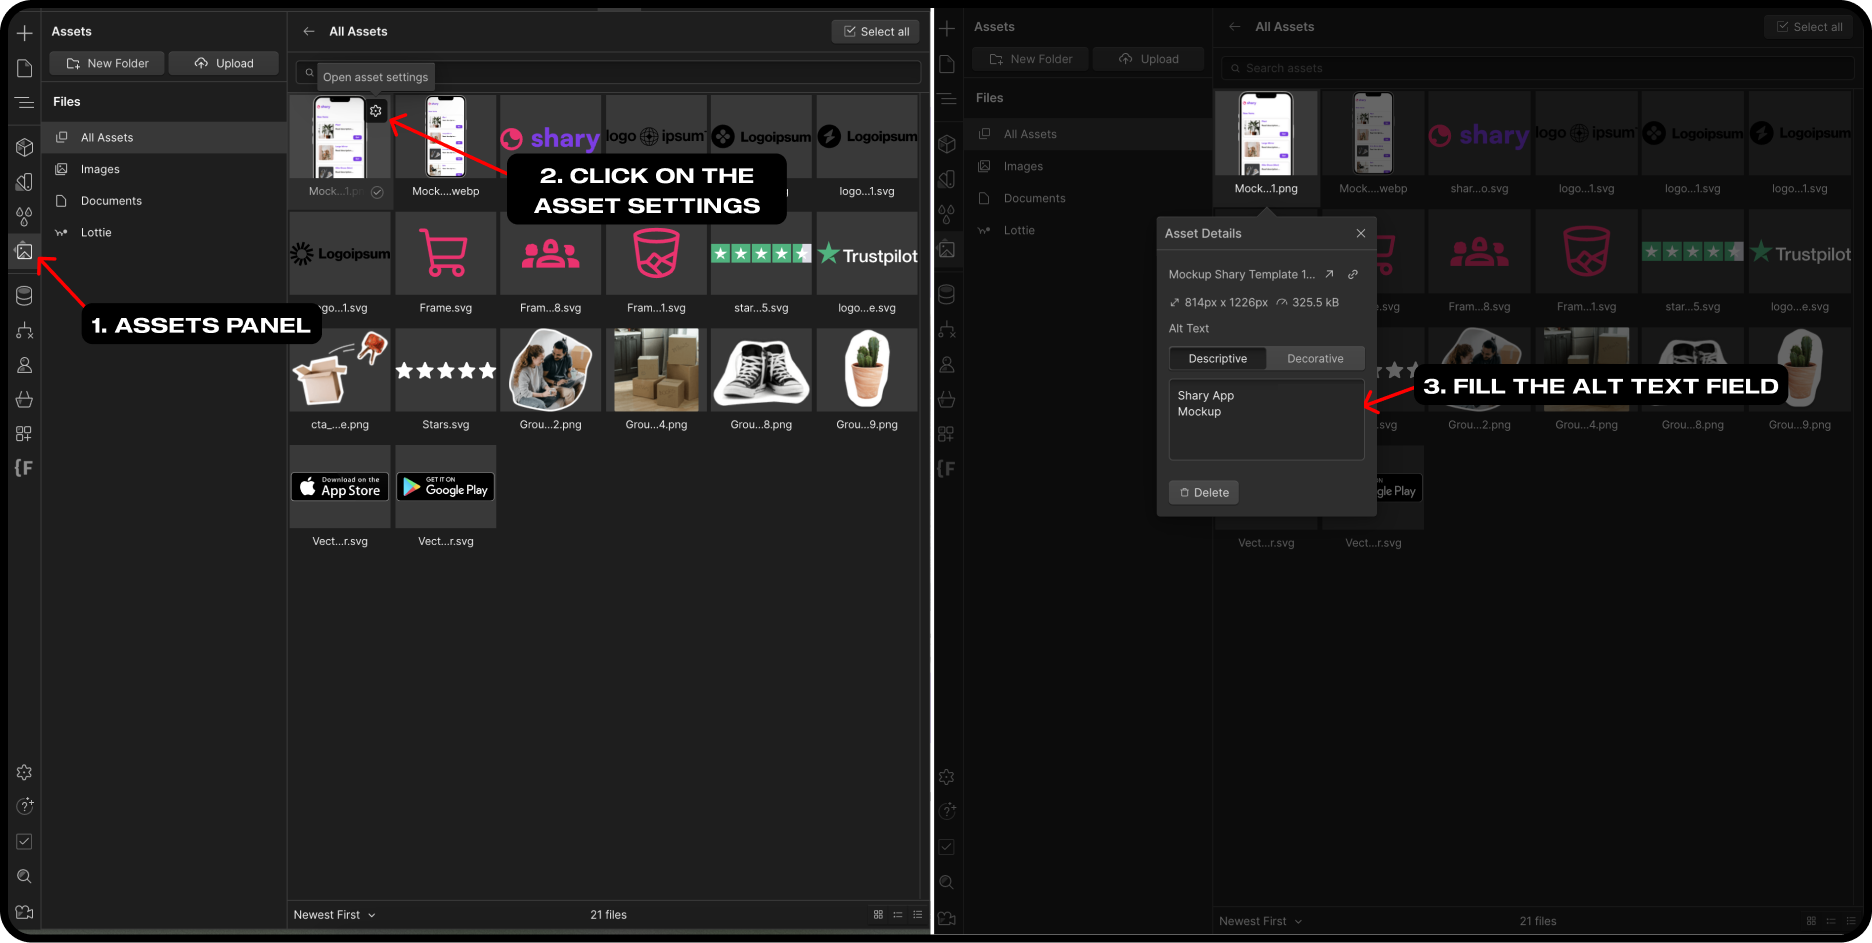
To write a relevant Alt Text, describe what you see in the image. Be very descriptive. It's better to be concise, but there is no limit to the length of the description.
Here is how ow to set Alt Text for your images on Webflow:
Google doesn't like it when your image loading time, and generally your site's loading time, is long. This is often synonymous with average performance in the eyes of Google and can have a negative impact on your SEO.
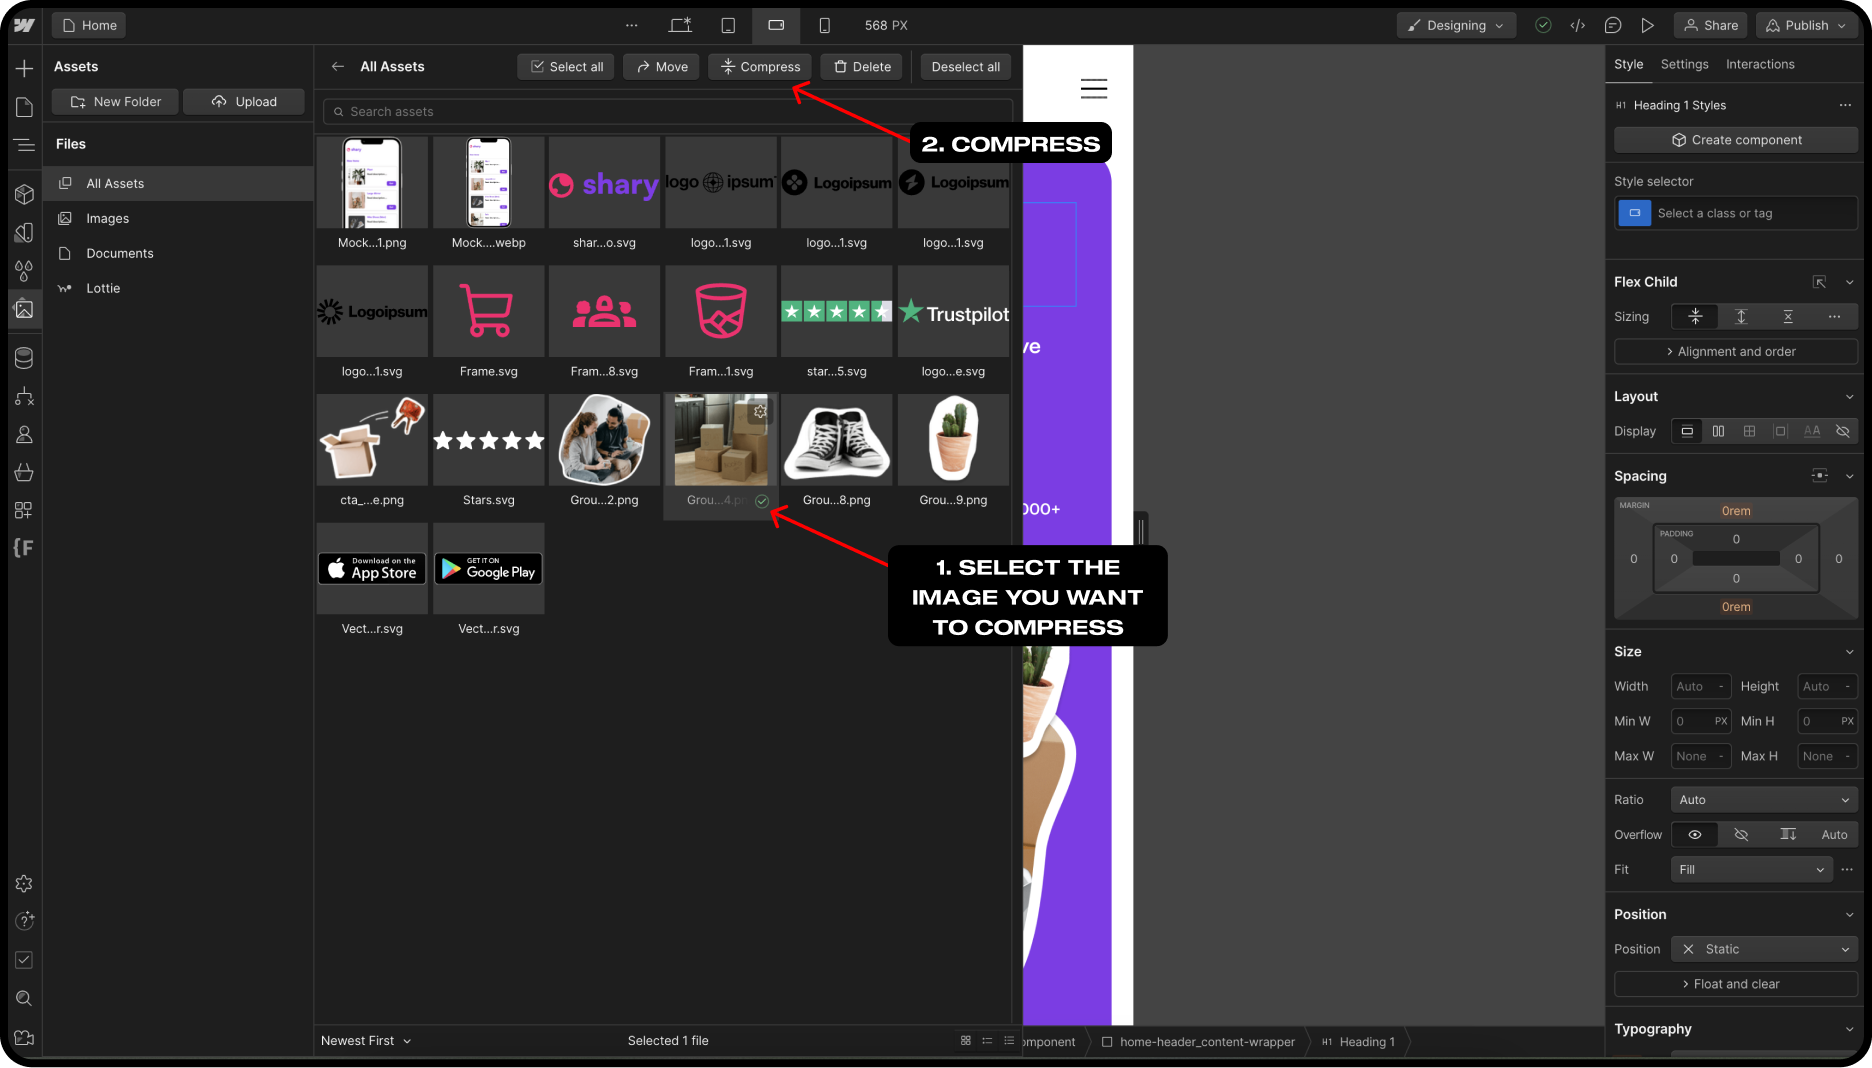
With the new WebP format, which significantly reduces the size of your images, it's advisable to convert your images to this new format.
You can convert them directly from the Webflow designer. To do this:
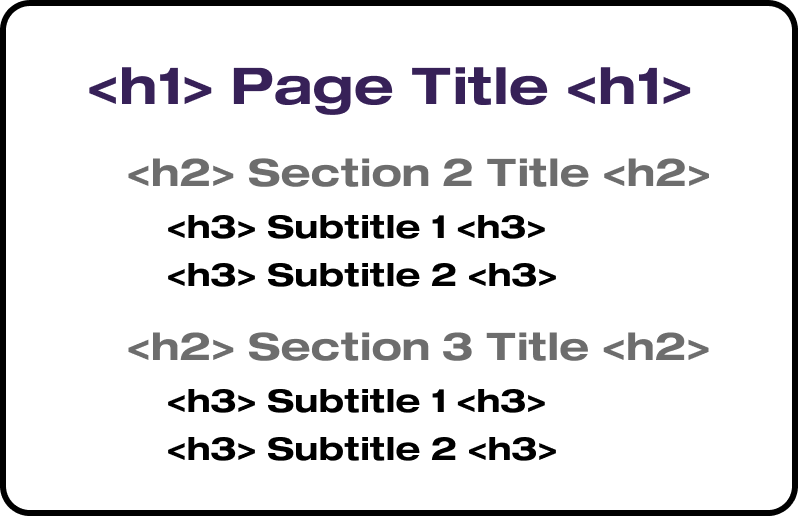
Let's now focus on your page content. Search engines read the content of your pages and try to understand the provided information, linking them to one another. Header tags (H1 to H6) help these search engines understand the structure of your pages and their content.
These titles provide information about the main subject and subtopics of different sections. It is essential to use these header tags correctly to provide information clearly to both search engines and your readers.
Here are the best practices for using these header tags:
The sitemap is essential in SEO. It is a file that presents the URLs of different pages on your site, allowing Google to find the pages you want it to index more quickly.
So, it is indispensable to create this file to avoid impacting your SEO performance.
If you host your site on Webflow with a custom domain, you can automatically generate your XML sitemap. To do this:
If the option of automatic sitemap generation does not suit you, you can create your own sitemap manually and add it to your site.
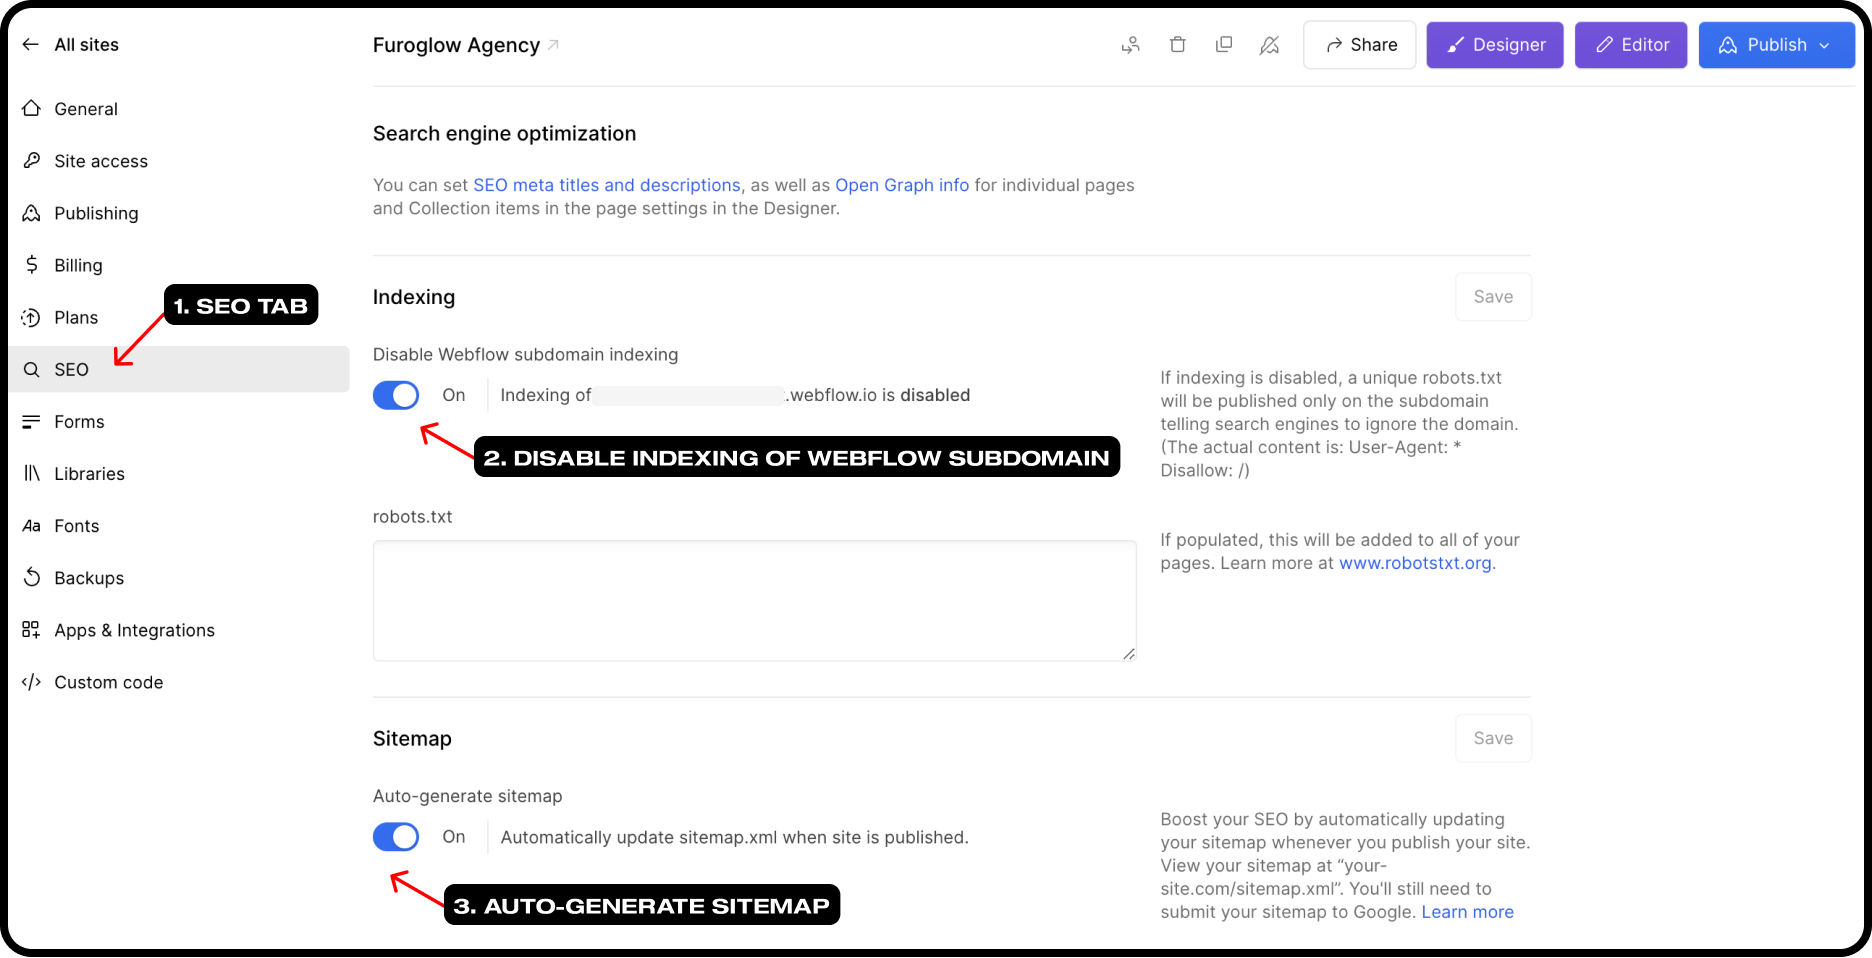
When you create your site on Webflow, you are automatically assigned a staging domain, which is a subdomain version of your site on webflow.io.
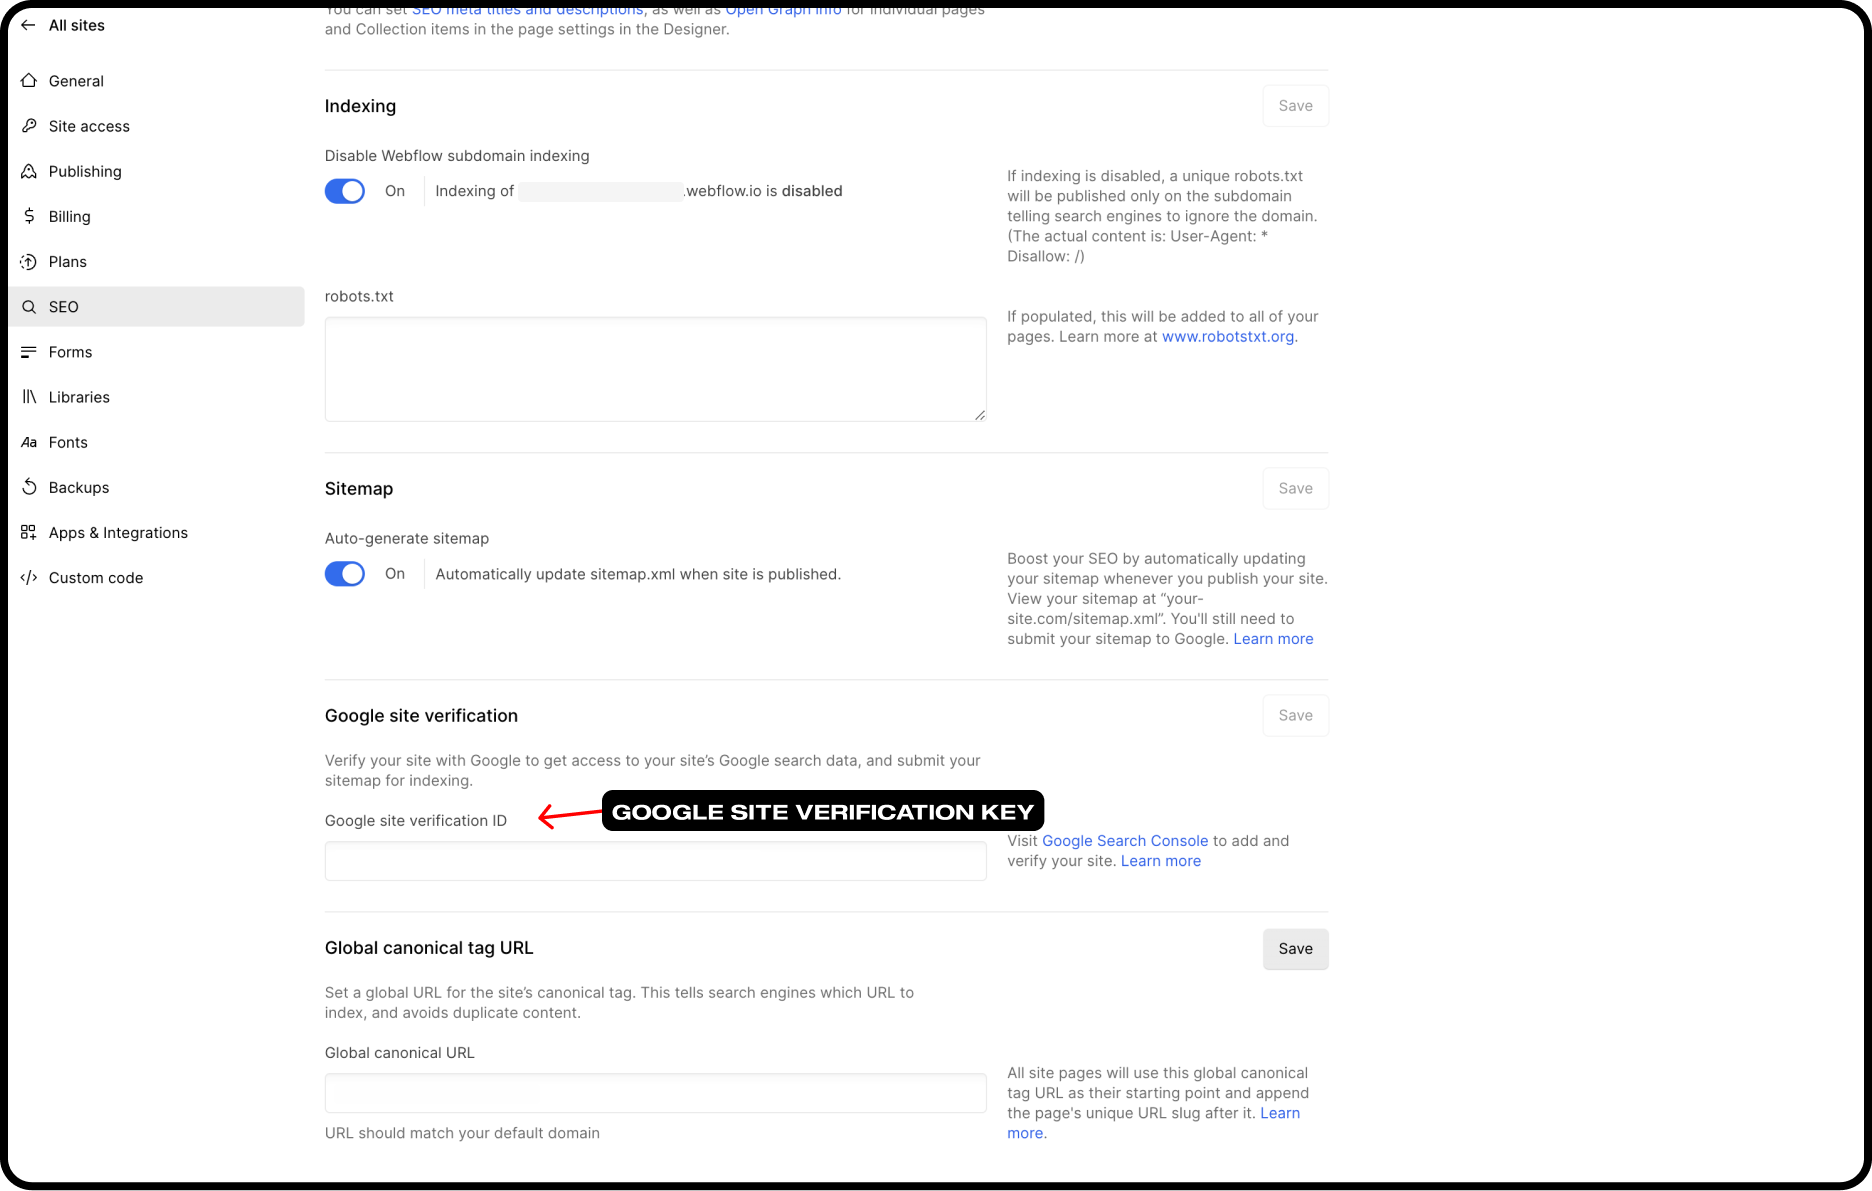
This is an exact copy of your site, except that you don't direct your users to it but to your main domain. So, it is necessary to disable the indexing of this site to avoid Google penalizing you due to the recognition of content duplication.
It's very easy to do this:
Robots crawl the content of your pages and rank them. Sometimes, when two pages with different URLs have the same content, these robots consider it as duplicate content and penalize these sites.
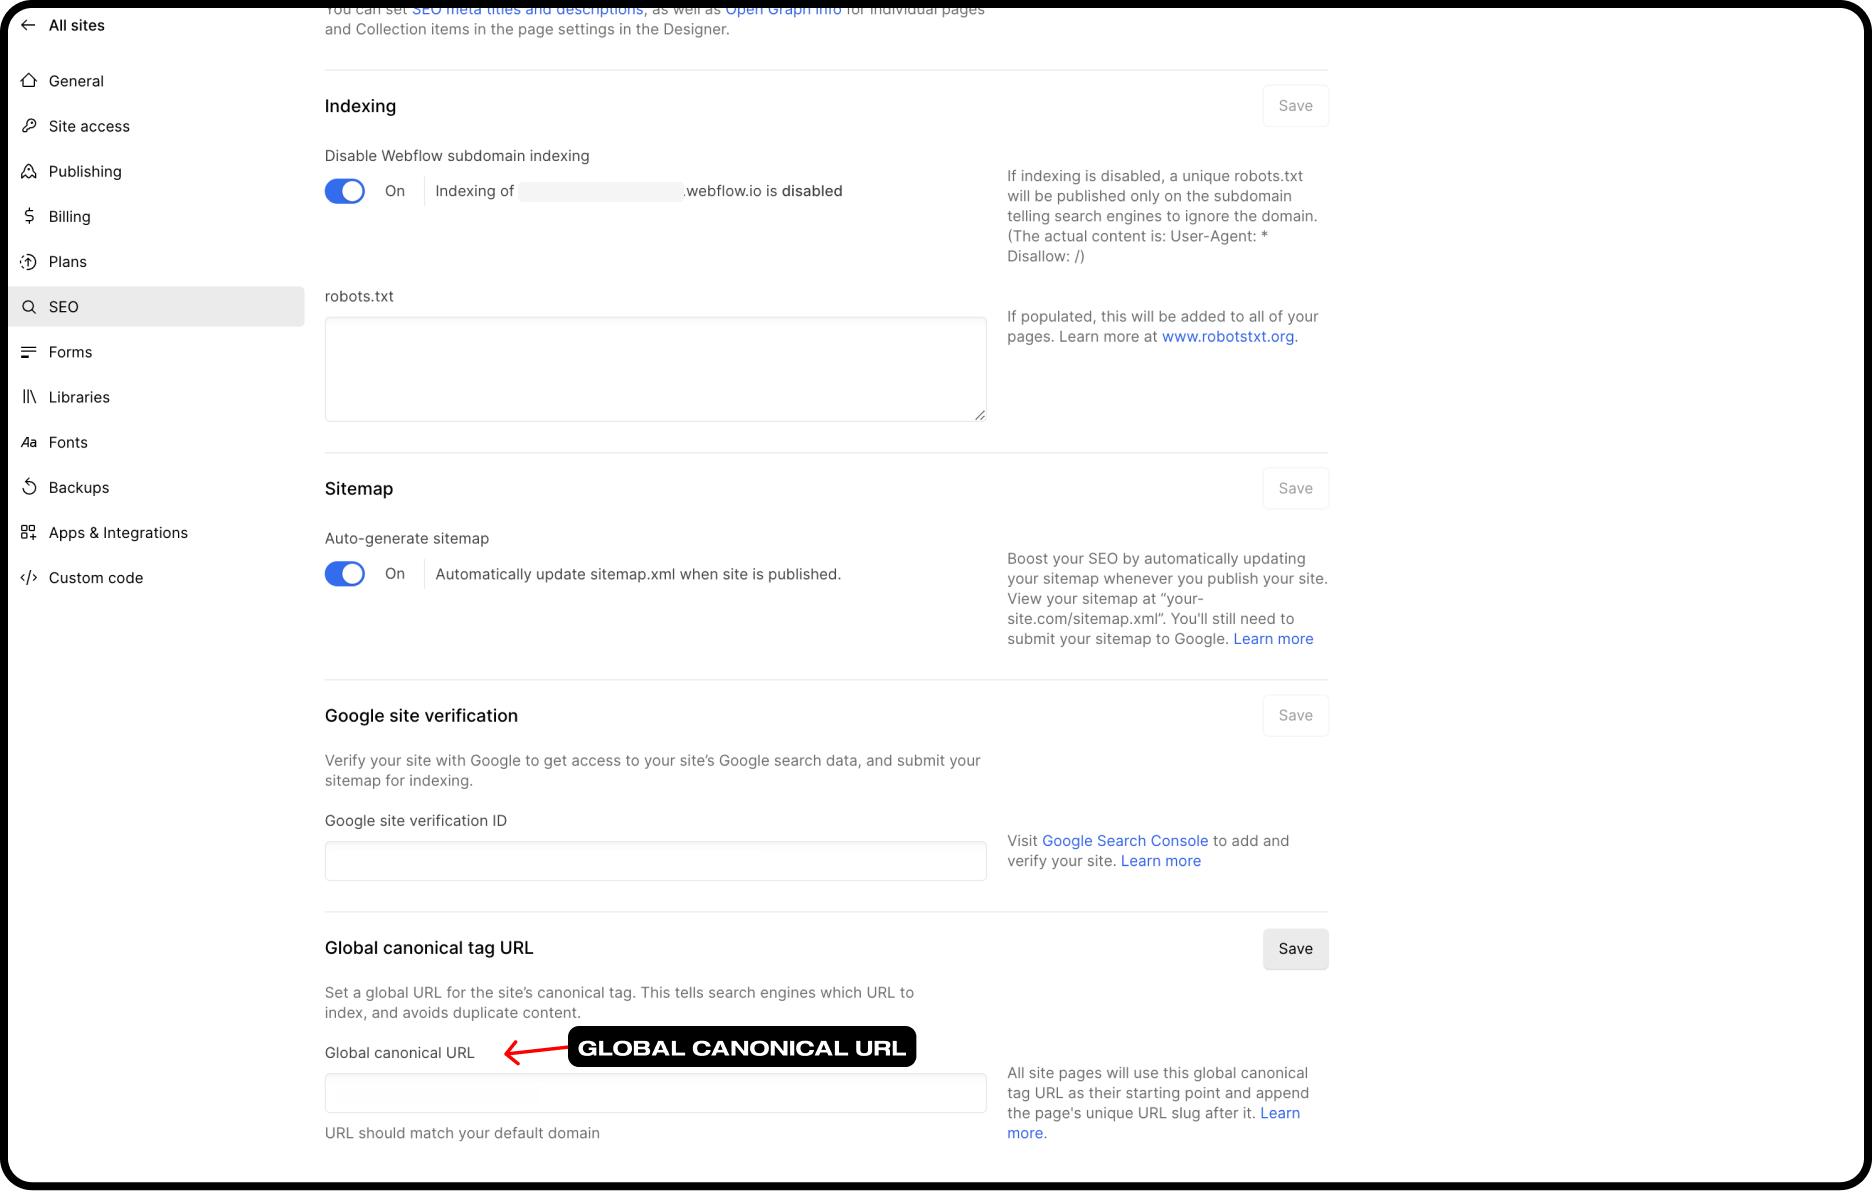
This is where the canonical tag plays a major role because it helps avoid Google detecting duplicate content. In simple terms, if set up correctly on your page, this tag will "tell" the robots that even if your site has different pages with the same content, there is a main page and reference should be made to it.
Webflow has made using this tag easy with the Global Canonical tag setting that you can find in the general settings of your site, in the SEO tab. Here, paste the URL of your site (for example, https://furoglow.com). Webflow will use this base to complete the canonical tags of each page from the slugs of your URLs.
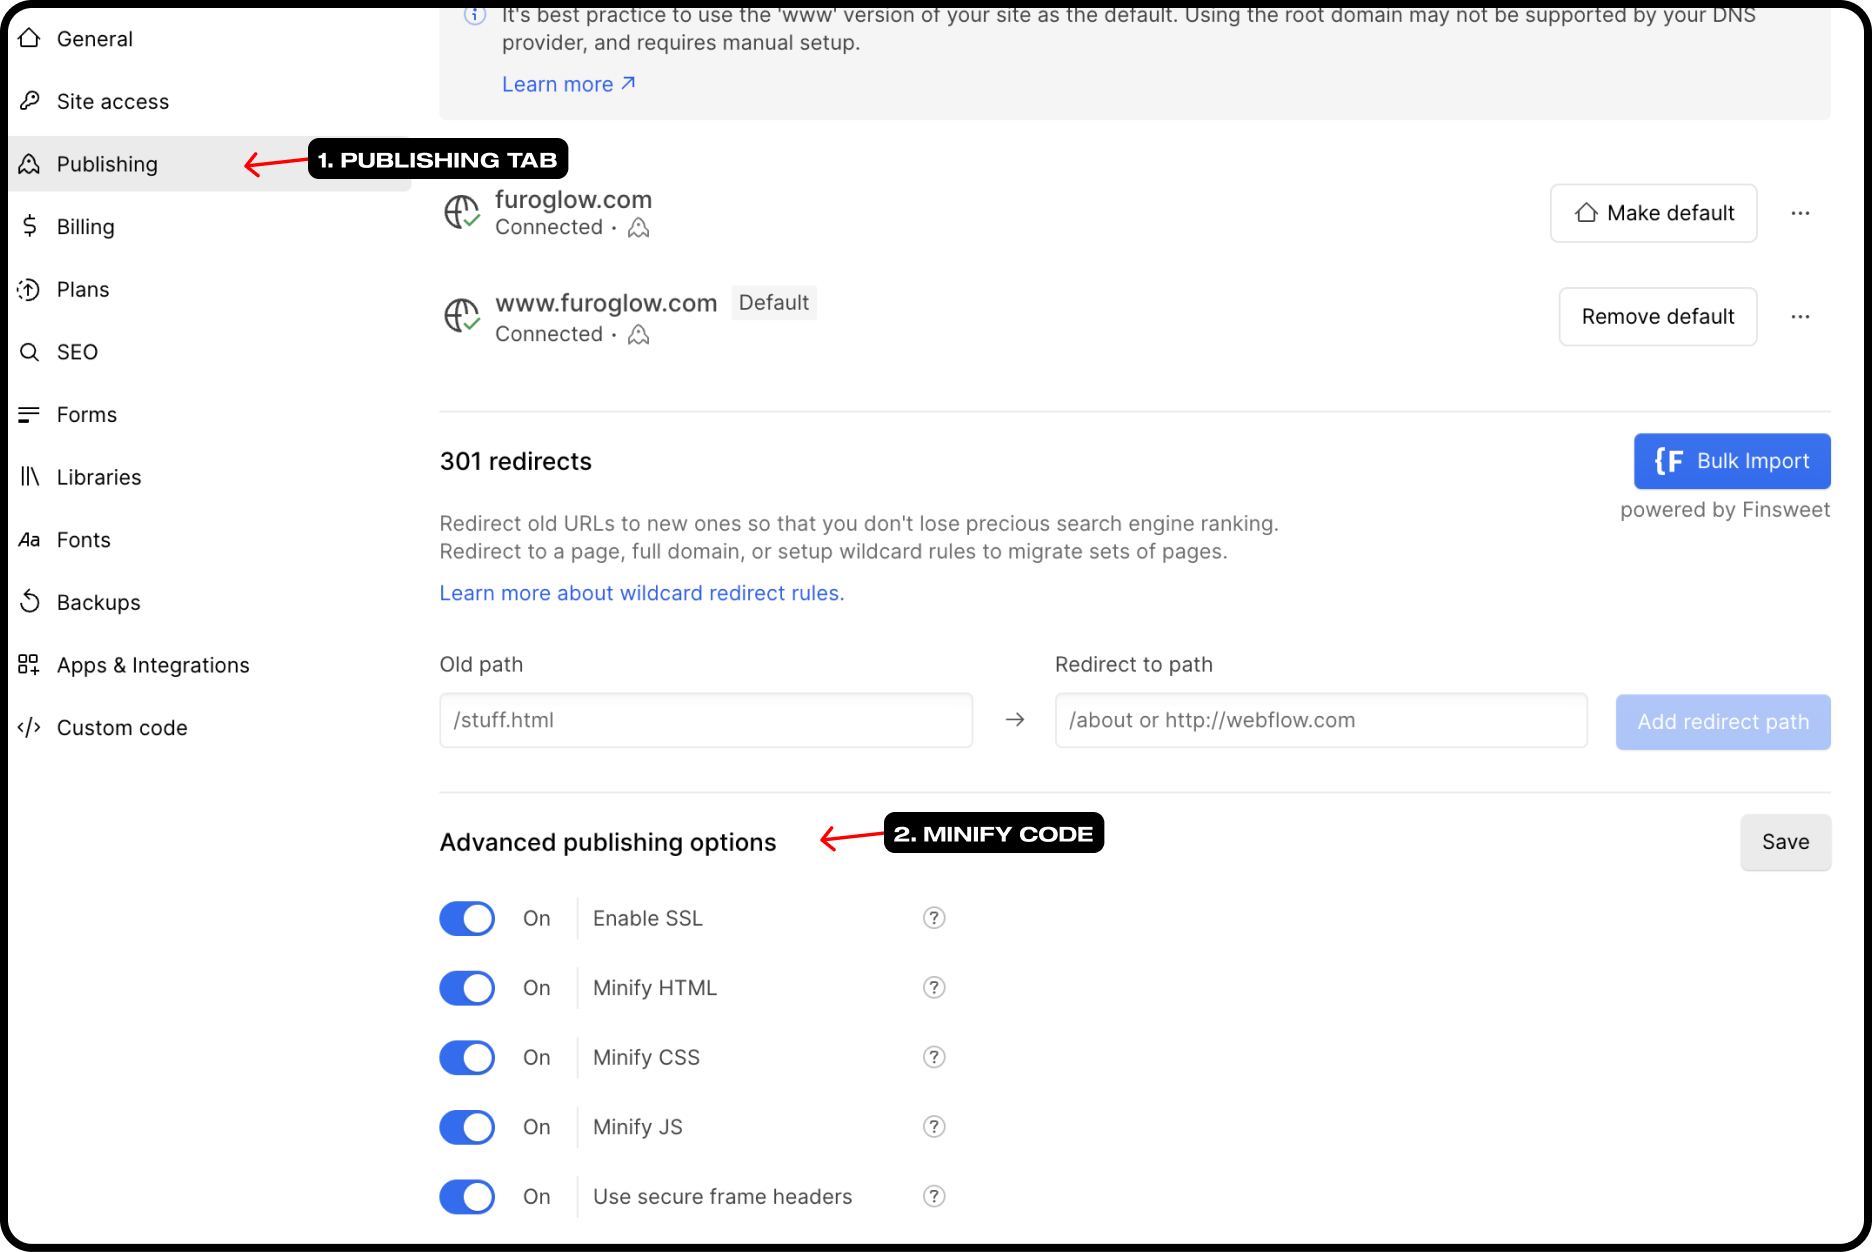
The loading speed of your site is important. Google tends to penalize sites with significant loading times. To lighten your site, you can follow these 3 steps:
Go to your site settings. Go to the publishing tab, scroll down, and enable the options:
In the Webflow designer:
In the Webflow designer:
Google Site Verification allows you to verify ownership of your domain. You must complete this step to ensure the indexing of your website on Google. Once your domain is verified, you will be able to use the tools of the Google Search Console and index your pages in search results.
Once you have your verification key, paste it into the Google Site Verification field in the SEO tab of the settings of your Webflow site. Webflow has a straightforward tutorial explaining how to set up your site for indexing.
All these steps will allow you to optimize your Webflow site pages for SEO and, at worst, avoid being penalized by search engines. It's about pleasing and making life easier for both robots and visitors. A clear configuration and construction of your pages will benefit you. In this regard, Webflow provides all the on-page technical tools to remain compliant with SEO rules. To go further, remember to optimize your text content and use the right keywords to hope to rank for your business's key terms.


Ready to step up to the next level? Book a call now and let's discuss your next project together.